Squealing and whistling brakes can at least annoy any biker. But this sound cannot be ignored. It should alert you, as it can lead to a more serious breakdown. The reasons can be different, depending on the type of mechanisms, and we will not only understand why the brakes on a bicycle squeak when braking, but also determine what needs to be done for proper braking and troubleshooting.
Why are the bike brakes squeaking?
The brake system on a bicycle is one of the most important, especially for mountain bikes. The quality of the adjustment of this system directly affects the safety, and sometimes the life of the cyclist. If you hear your bike brakes squeak, you should check its brakes.
Depending on the impact on the wheel, the brakes are divided into rim brakes and disc brakes. The first type is considered the most common.
How to check the brake system?
Before proceeding with the adjustment of the brake system, it is necessary to go through the procedure for checking it. For this, you need:
- Raise the front bike wheel so that it does not touch the ground. Rotate it and pay attention to whether it touches the brake pads briefly, whether there are extraneous sounds. If the wheel touches the brake pads, then it most likely has a figure eight. This problem needs to be fixed.
- Adjustment of the brake system is necessary if the wheel slips when the brake lever is pressed, or braking delay is noticeable.
- It is necessary to check the appearance of the cables and shoes of the brake system, as they are almost constantly in contact with the environment. Pay attention to the integrity of the cables, even a break in one core can lead to failure of the entire system. If a break is found, replace the entire cable. Clean the entire brake system of dirt.
When to adjust the bike brakes?
Adjustment of the bicycle brake system is necessary in the following cases:
- After you have bought a bike, you need to check its operation under increased load. Then it is required to inspect the bicycle and adjust all its systems, including the new brake blocks.
- After a bike has been dropped or hit, the bike brakes need to be adjusted.
- If the bike was stored in an unheated room, then the bike brakes need to be adjusted.
- When the brakes are applied, a grinding or other sound is felt.
- When you press the handle, the reaction of the brake blocks has changed, there is a delay in operation.
Adjustment steps
The first thing to start with is to fix squeaky bike brakes – the bicycle must be placed in an upright position, for this special support-racks are provided. It is also necessary to prepare a tool, it must be constantly at hand. The tools mainly include:
- Hex keys.
- A special bicycle wrench, or an Allen wrench.
- Screwdriver set, including flat head screwdrivers.
- If the brake pad does not have a solid base, then a wedge gasket will be required.
- Small rag for cleaning from dirt.
ADJUSTMENT STEPS
The position of the brake levers on the bike handlebars is adjustable

Firstly, you need to adjust the position of the handle on the bike handlebars. This may seem strange at first glance, but the subsequent adjustment of the entire brake blocks as a whole will depend on the position of the handle. The handle fixing screw must be loosened a few turns, then set the handle to a comfortable position. The lever should be pressed with the second phalanges of the fingers. You need to adjust the basic position of the levers. An adjustment screw is used.
Direct adjustment of brake pads
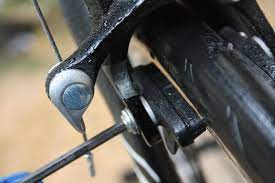
The pads must fit well to the wheel rim, this is the most important condition that must be ensured. First, it is necessary to ensure the required clearance of the pads that are in the non-working position. The most optimal distance from the block to the rim should be within one mm.
Adjustment sequence:
– We loosen the bolts securing with which the block is attached. She must become mobile;
– if the block is rigid, then we orient it parallel to the rim;
– pads should not touch the rubber of the bike wheel;
– tighten the fastening bolts, securing using fixing washers.
Installing the brake levers
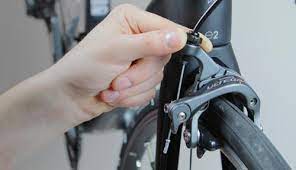
The levers are installed on both sides of the rim. They need to be centered in order to work properly. Contact with the rims must occur simultaneously. Each lever has a tension screw. In the event that the block touches the rim faster than the opposite, it is necessary to increase or decrease the spring tension. The adjustment will be completed if the pads on the left and right touch at the same time.
We adjust the stiffness of the brake blocks
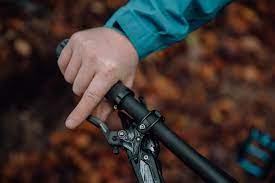
The final step is to ensure that the braking system works reliably and comfortably. At the beginning, the handles were set in a comfortable position. Now you need to adjust the length of the cables and their tension. Just press the brake lever, the brakes should work with minimal pressure. Use the tension nut to adjust the lever travel. Try to install it not too large, experts do not recommend doing this.
After carrying out all stages of adjustment, it is necessary to check the functioning of the brake system. Check the operation of the brakes directly on the stand. When you press the levers, the wheel should stop almost instantly. Then do some kind of test drive. The brake system should work almost instantly after pressing the lever. Quality brake adjustment will give you the safety and confidence you need.
Disc brake adjustment
Bicycle disc brake device
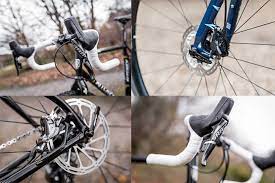
The kinetic energy of the bike when using disc brakes is converted into heat. It does this by rubbing the disc pads against the brake disc. Disc brakes in vehicles can be mechanical or hydraulic.
Most cyclists who first encounter mechanical or hydraulic disc brakes don’t know how to set them up or what to do with them. It is especially important to know how to replace consumables. The device of disc brakes, especially hydraulic ones, is more technologically advanced than V-brakes. They are more reliable, but it should be remembered that such units and mechanisms are not budgetary in terms of price.
Bicycle mechanical disc brakes
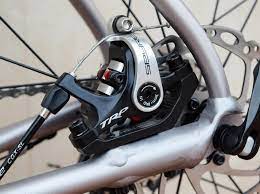
The design of disc mechanical brakes is as follows:
- Brake handle. Mounted on steering wheel. A clamp is used as a fastener.
- Rope adjuster. It is used to regulate the tension force of the cable.
- Brake lever adjuster. The handle is installed taking into account the length of the fingers of the cyclist.
- To protect the cable from possible contamination and damage, a cable jacket is used.
- The place where the cable is attached is called the latch.
- A caliper is used to actuate the brake pads.
- Brake pads. They are made of metal, a substance of organic origin is applied to their surface. The pads are mounted in the caliper.
- Adapter. It is mounted as a layer between the bicycle frame and the caliper.
- The disc rotors is mounted on the wheel hub.
Bicycle hydraulic disc brakes
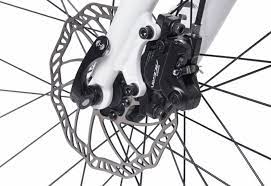
Hydraulic brakes work just like mechanical brakes. The difference lies in the fact that the force is transmitted with the help of brake fluid, and not with the help of a cable. Brakes such as Avid, Hayes, Helix use DOT4 brake fluid. Shimano oil can also be used as an alternative. An important component of hydraulic disc brakes is the master cylinder. It stores brake fluid. To connect the mother cylinder to the caliper, a hose is used, called a hydraulic line.
Adjustment process
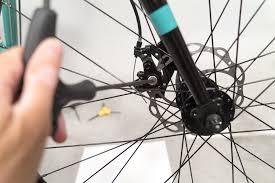
- Check the operation of the rotor. The device is dismantled and checked for mechanical damage. In the presence of deformation, the rotor should be leveled. In the event that the deformation is not significant, then the elimination of deformation can be carried out when adjusting the brakes.
- Determining brake pad wear. The pads are removed one by one. Dismantling is done quickly. You should also check the brake pads for mechanical damage. If the damage is significant, then the block must be replaced.
- You need to check the condition of the cables. Even if one core is damaged, the cable must be replaced. Only after all damaged cables have been replaced can the brakes be adjusted. The new cable must be lubricated without fail. The cable jacket should be carefully inspected. In the presence of cracks and other mechanical damage, the shirt must be replaced.
- Check for hydraulic leaks. This check is made exclusively for hydraulic disc brakes. If there are even minor mechanical damage, then the hydraulic line must be completely replaced.
- It is required to remove oil and dirt from the rotor and brake pads. Dirt and oil accumulated on the brake pads and rotor reduces the efficiency of the brake system as a whole. The rotor is dismantled, and the surface is cleaned using mostly fine sandpaper. We process brake pads in the same way (of course, on one side).
After the adjustment, you need to make sure that the wheel is installed correctly. Any distortion to the right or left side is excluded. To do this, put the bike on the wheels, loosen the eccentric and, pressing the saddle with your hand (while the bike should be oriented evenly), tighten the eccentric.
Conclusion
A bicycle’s braking system needs constant adjustment, especially when bike brakes squeak. This will make it possible to operate the bike safely in the most difficult conditions. Self-tuning and adjustment requires certain skills. If properly adjusted rim brakes, they will work for a long time, and no worse than disc brakes. Some models work even better.

