
Pedals are the most important control element in a bicycle. It is through them that the forces from the leg are transferred to the chassis, setting your vehicle in motion. And today we will figure out how to unscrew the bicycle pedals, and then put them back in place or put new ones.
When may it be necessary to remove the pedals?
Let’s first find out under what circumstances it may be necessary to remove the pedals. As a rule, such a need arises in the following cases:
- Scheduled pre-season maintenance;
- If any extraneous squeaks or crunch are detected;
- Replacing pedals or cranks;
- Preparing the bike for winter storage or transportation.
Classification of bicycle pedals
Today, cyclists are pleased with the abundance and variety of models of self-propelled bikes. Not only frames, wheels, brake systems and transmissions look original, but also ordinary pedals. It is they who, at the first opportunity, become the object of tuning. Well, taking into account the fact that a considerable share of the load also falls on them, there is a growing need to master the process of self-removal and installation of these parts. What’s more, if the bottom bracket assembly needs to be serviced, there’s no other way to get to it except by removing the sprocket and pedals from the bike.
Let’s start with the classification of parts, thanks to which we actually set the cycle machine in motion. Structurally, it can be divided into three types:
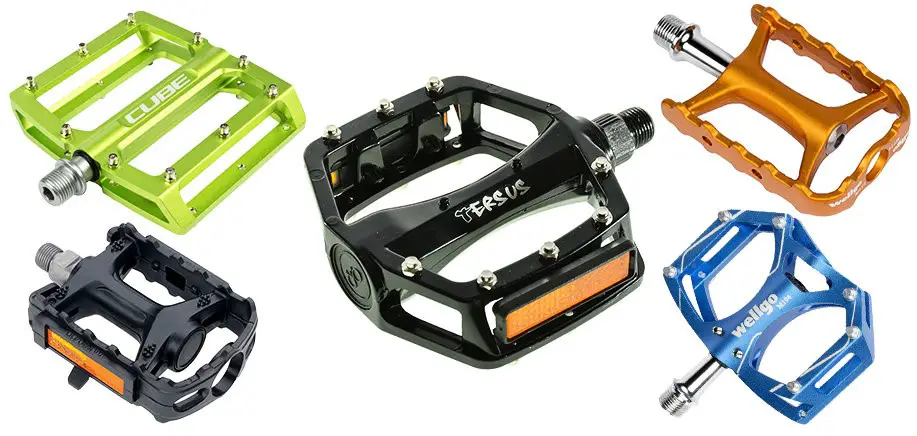
- Platform – the most common, installed on adult, children’s, urban stunt and mountain bikes;
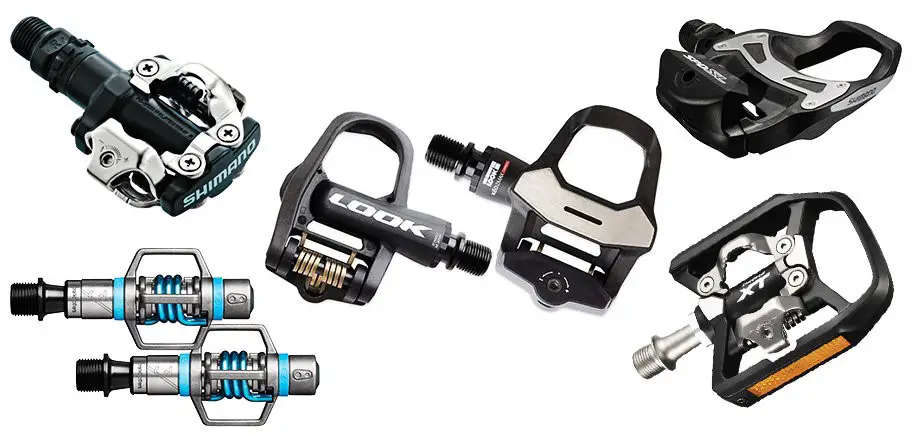
- Clipless – the shoes are rigidly fixed on the pedal, engaging with it with the help of a spike mounted on the sole of special shoes.
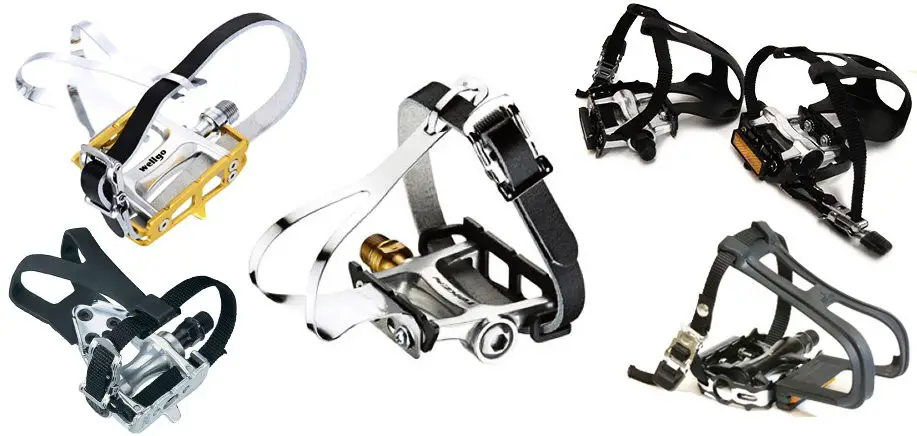
- Clip – have additional foot fixations in the form of metal brackets and straps. Toe clip pedals are not recommended for mountain biking, with the majority of clip pedals being found on commuter bikes or indoor fitness bikes.
Pedal design
Structurally, a bicycle pedal consists of several parts:
- The axle is a metal pin screwed into the crank arms. It is the basis for the rest of the structure.
- Platform vs clipless vs clip – a plane that is in contact with the foot and is fixed on the axis.
- Bearings – a node that connects the axle and the platform, providing rotation.
- Accessories – bolts and nuts that fix all the components of the pedal. Unscrew during disassembly.
What tools are suitable for removing pedals?
The available arsenal is quite wide – it includes the following tools:
- Adjustable spanner;
- Pedal wrench;
- Cone wrench;
- rubber hammer;
- Hex key.
When choosing tools, it is also important to pay attention to its thickness, because in most bicycles the distance between the pedal mount and the crank arm is very small, so the key may not even fit into the gap.
How to remove the pedals?
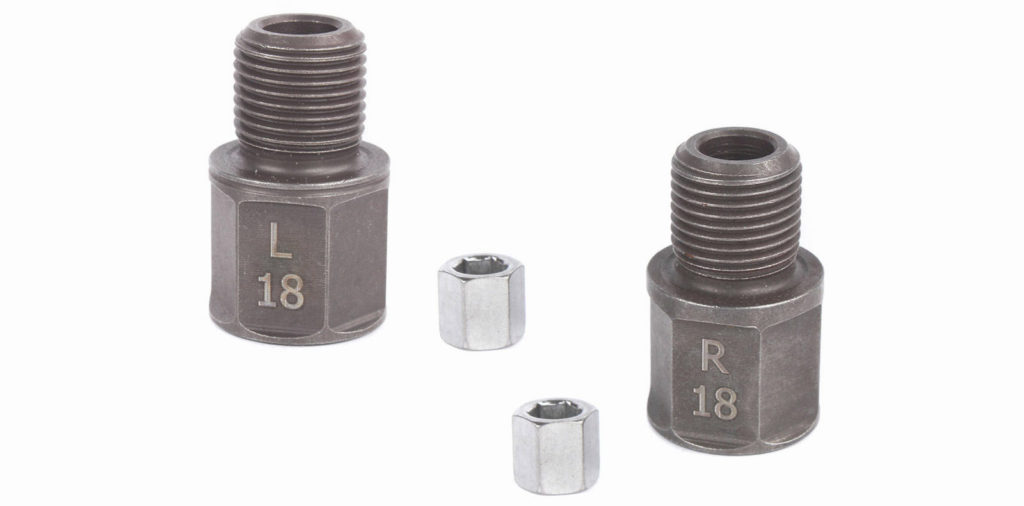
Firstly, take a closer look at the fastening thread on screws – on both sides there should be a marking L – Left and R – Right. It indicates the direction of the thread. The left pedal rotate counterclockwise and the right pedal rotate clockwise.
In order not to be mistaken, just remember that you need to unscrew the bicycle pedals towards the rear wheel, and twist it towards the front.
The process itself is quite simple.
Step 1
It is best to do this when the bike is on its wheels. The fact is that sometimes you need to make quite a lot of effort to unscrew it, and you have to use the weight of your entire body. This is easier to do when the bike is standing on its wheels than when it is hanging on the rack.
Step 2
We remove the right pedal by pedal wrench. For this, it is best to put the right crank arm in the 3 o’clock position: the crank arm is horizontal to the ground and turned towards the front wheel. Taking into account the fact that the right pedal has an ordinary thread, we unscrew it like an ordinary thread – counter clockwise.
Step 3
Then remove the left pedal by pedal wrench. We put the left crank arm in the 9 o’clock position. It is again horizontal to the ground and turned towards the front wheel. We remember that the left pedal has a left thread and unscrew it pedal clockwise.
Now you know how to unscrew the bike pedals on a bicycle, but we have considered only the simplest case, when the mount is in good condition and has been regularly cleaned by the owner before. In practice, a huge amount of dirt often sticks to the thread, which, like glue, prevents it from turning normally. What to do in this case?
Foremost, try applying WD-40 to the joint and leave the bike for 10-15 minutes. You can also use kerosene, but you will have to wait longer – 2-3 hours.
In general, in this case it is better to abandon the “self-treatment”, entrusting the maintenance and repair of the bike to professionals.
If the pedal needs to be replaced, buy new pedals before unscrewing and removing anything.
How do you remove stubborn pedals?
How to install bike pedals?
The process of installing bike pedals is quite simple. When twisting the pedal, the following nuances should be considered:
If you removed the pedal for maintenance and plan to continue using it on a bicycle, then you should clean it of old grease and dirt, and also apply a penetrating oil and bike grease.
It is better to start turning the pedal with your hands strictly perpendicular to the axis of the crank arm. Without a pedal wrench, it is much easier to guide the threads in the right direction and prevent them from licking.
If there is a hex slot on the pedal axis, then it can also be screwed in with a hex. The only thing is that it is quite difficult to apply high pressure to the pedal and securely fix it, therefore, after the initial tightening, it is better to additionally tighten it with an open-end wrench.
It is necessary to twist the pedal axis into the crank arm strongly, but without excessive fanaticism, because then unscrewing will give you a lot of problems.
Otherwise, the process of twisting the pedal is similar to unscrewing, only the rotation is carried out in the opposite direction.
How to check?
If you want to be sure of your bike, it is advisable to check the pedals and tighten them before each ride. To do this, you can simply unwind the pedal and pay attention to how it behaves while driving. If there are any backlashes, extraneous sounds or displacements, it is better to solve this problem before the trip.
Why can’t I get my bike pedals off?
You need a good key or pedal wrench, put it in a suitable position and turn the bike in the right direction, pressing with your foot. If the slots on the most pedals are cut and if there are 6 of them, then the next step is to disassemble the pedal on the crank arm, put on a 15 socket wrench and work with it. In case of failure, replacement of crank arms.
Why does the crank arm unwind?
In general, the reasons may be different, but the common source can be called a defect in the part: axis or crank arm. The defect can be factory, acquired from long-term use, and acquired during incorrect installation.
How to determine the length of the bicycle crank arm?
The length of the crank is measured by the distance from the axis of the pedal to the center of the carriage. Most bicycles are equipped with crank arms in the range of 170-175 mm, but the range can be extended from 140 to 190 mm.

